Automating Network Infrastructure with Cisco Catalyst Center and Terraform using Netbox as a CMDB
- Marco
- Jan 9, 2024
- 7 min read
Updated: Jan 10, 2024

Preface
In the realm of network automation, there's no definitive right or wrong, or a better/worse approach. I'm often asked about the tools I use. My answer varies depending on when you ask me. Currently, I prefer using Postman to showcase the capabilities of APIs. For larger-scale deployments, I lean towards Terraform for setting up the infrastructure, complemented by Ansible or Python for additional tasks like template rollout or device claiming.
My interest in Terraform began to grow after attending Cisco Live, where I was attending a fabulous presentation given by Patrick Mosimann (https://about.me/patrick.mosimann).
BRKOPS-1183: Cisco Live On-Demand Library
I highly recommend watching this presentation. It provides a comprehensive overview of Terraform and how it integrates with Cisco's Catalyst Center.
However, for the sake of this post, I want to demonstrate a more real-life example in a larger-scale deployment.
Scenario
This time, I opted to use a real CMDB (Configuration Management Database) instead of a conventional Excel file. My choice fell on Netbox, primarily for its simplicity and smooth operation on my personal computer at home.
The challenge now lies in extracting the relevant data from Netbox and converting it into HCL (HashiCorp Configuration Language) code, which can be utilized by Terraform to configure the Catalyst Center.
The goal is to create 100 areas, each with two subareas. Each subarea includes a building and an associated IP Pool.
To accomplish this task, I followed these steps:
Netbox → Python → Jinja → Terraform → Catalyst Center
Curious? Then Dive Right Into It!
Let's begin with a plain, empty Catalyst Center deployment.
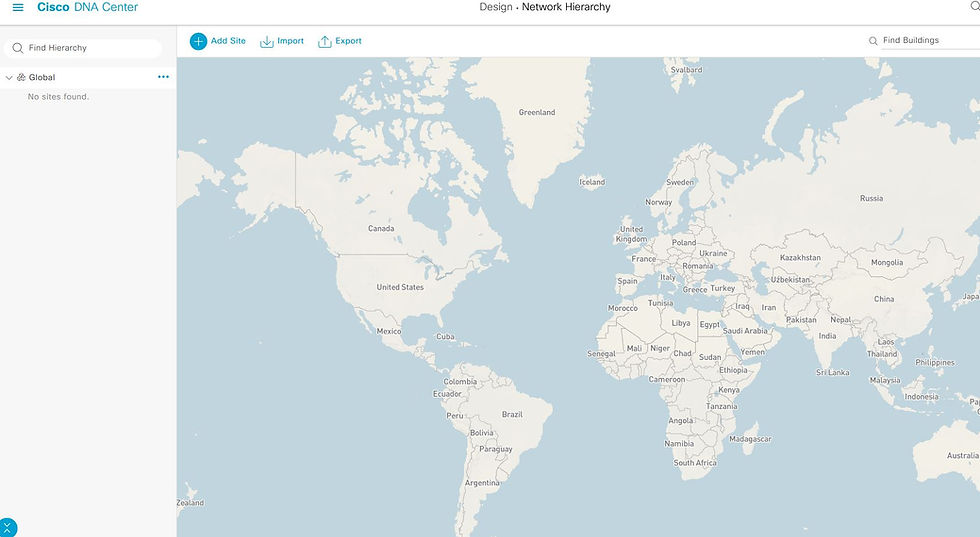
Initial Setup
However, we start with an already prepared Netbox setup like this:
Region
Site 1
IP Pool for Site 1
Site 2
IP Pool for Site 2
....and this pattern repeats for a total of 100 times.

Given that the object naming conventions differ between Netbox and Catalyst Center, I anticipate this might cause some confusion for readers. To mitigate this, I've created a simple translator:
Netbox | Catalyst Center |
Region | Area |
Site | Building |
IP Pool | IP Pool |
Of course, you can approach this in various ways, but I found the following method quite useful.
In this scenario, we leverage Jinja templates to create the variables.tf file. This is crucial because we need to include all sites and areas within this file. I'll elaborate more on this shortly.
To obtain the required data from Netbox, I used the Python SDK pynetbox.
import pynetboxafter that, we create the netbox instance. You need to create an API token in Netbox beforehand. (this is not my actual one, created by a password generator :-) )
nb = pynetbox.api(
      'http://localhost:8000',
      token='df8b5b0b12d3ec861f8cfd9612b329629a9a55ee'
    )
When I consulted ChatGPT for a solution to this problem, the response was an extremely complex and nested code, not very beginner-friendly.
Therefore, I decided to adopt a modular approach, similar to what Patrick Mosimann demonstrated in his session. This modular approach makes the code more scalable, and modifying different parts of the code becomes much easier.
Since different resources in the dnac Terraform provider require different approaches, we'll tackle them one at a time, starting with Areas, Regions in Netbox respectively.
This part is relatively straightforward.
For each step, I began by consulting the Terraform provider to determine which variables or parameters were needed.
After playing arounda bit, I came up with this HCL code. My .tf file looks like this:
resource "dnacenter_area" "sites" {
  provider = dnacenter
  count = length(var.sites)
  parameters {

    site {
      area {
        name        = var.sites[count.index]
        parent_name = "Global"
      }
    }
    type = "area"
  }
}
The only parameters I needed were the names of the sites, ensuring that global was their primary parent.
I then returned to my Python code to acquire the data via the Netbox SDK.
In my situation (which will likely be similar for you), the ID of the 'Global' element was 8. Therefore, I collected all regions from Netbox that had this ID as their parent element
create_var_jinja.py
regions = list(nb.dcim.regions.filter(parent_id="8"))Without hesitation, I began working on the Jinja template. Since we have 99 regions, I leveraged the functionality of HCL to use lists. This means I only need to write the code for creating an area once, and Terraform will execute it for every item in this list.
Thus, the code in the variables.tf file should look like this:
variable "sites" {
  description = "List of all Sites"
  type        = list(string)

  default     = [
    "Region1","Region10", "Region20"
  ]
}
Please pay attention to the formatting. It's important to note that the last entry in the list must not have a comma at the end; otherwise, the code won’t work.
I addressed this issue by incorporating an 'if' statement. In the first loop, I add the variable without a leading comma. For all subsequent iterations, I include a comma.
To ensure everything is written in one line without unnecessary whitespace, I add a dash at the end or beginning of the statements, as needed.
variable.js2
variable "sites" {
  description = "List of all Sites"
  type        = list(string)

  default     = [
    {% for site in sites -%}
    {% if loop.first -%}
    "{{site}}"
    {%- else -%}
     ,"{{site}}"
     {%- endif %}
    {%- endfor %}
  ]
}
Lets see how I added the Buildings.
Again start by a single .tf file trying to set up a single building in an area with the help of the docs.
This was the outcome:
resource "dnacenter_building" "all_buildings" {
  provider = dnacenter
  count = length(var.building)
  parameters {

    site {
      building {
        name        = var.building[count.index]["name"]
        latitude    = var.building[count.index]["lat"]
        longitude   = var.building[count.index]["long"]
        parent_name = var.building[count.index]["parent"]
      }
    }
    type = "building"
  }
}
As you can see this time I used not only lists but also maps. Because every building have several required paremeters. They work like dictionarys in other common programming languages. So we can have all Buildings within a list and their required parameters within the map.
The suitable code to archiving this in the variable.tf file is:
variable "building" {
  description = "all buildings with longitute, latitude and parent"
  type = list(map(string))

  default = [

    {
      name = "Site11"
      long = "50.0"
      lat = "50.0"
      parent = "Global/Region1"

    },

    {
      name = "Site12"
      long = "50.0"
      lat = "50.0"
      parent = "Global/Region1"

    },
  ]
The Terraform resource requires at least the name, the parent, and the coordinates for each site. For simplicity in this example, I've used the same coordinates for all sites. In a real-life scenario, you would typically use custom tags in Netbox to define unique coordinates for each site.
Once again:
Netbox = Site
Catalyst Center = Building
To obtain all the necessary data, we first gather all the sites. Then, we iterate through them, saving the name and the parent respectively in a dictionary. After that, we include this dictionary in the list of buildings.
create_var_jinja2.py
sites = nb.dcim.sites.all()
    buildings = []
    for site in sites:
        buildings.append({
            "name" : site.name,
            "parent" : site.region
        })
This time, it is permissible to have a trailing comma at the end, which significantly simplifies the formatting process.
Now, let's delve into the Jinja template. It's important to pay attention to the variable type. We are dealing with a list. Within this list, there's a map (dictionary) containing strings.
variable.js2
variable "building" {
  description = "all buildings with longitute, latitude and parent"
  type = list(map(string))

  default = [
    {% for building in buildings %}
    {
      name = "{{building.name}}"
      long = "50.0"
      lat = "50.0"
      parent = "Global/{{building.parent}}"

    },
    {% endfor %}
  ]
}
So far, so good. Executing the code has been successful, and I now have 99 sites, each with two buildings.
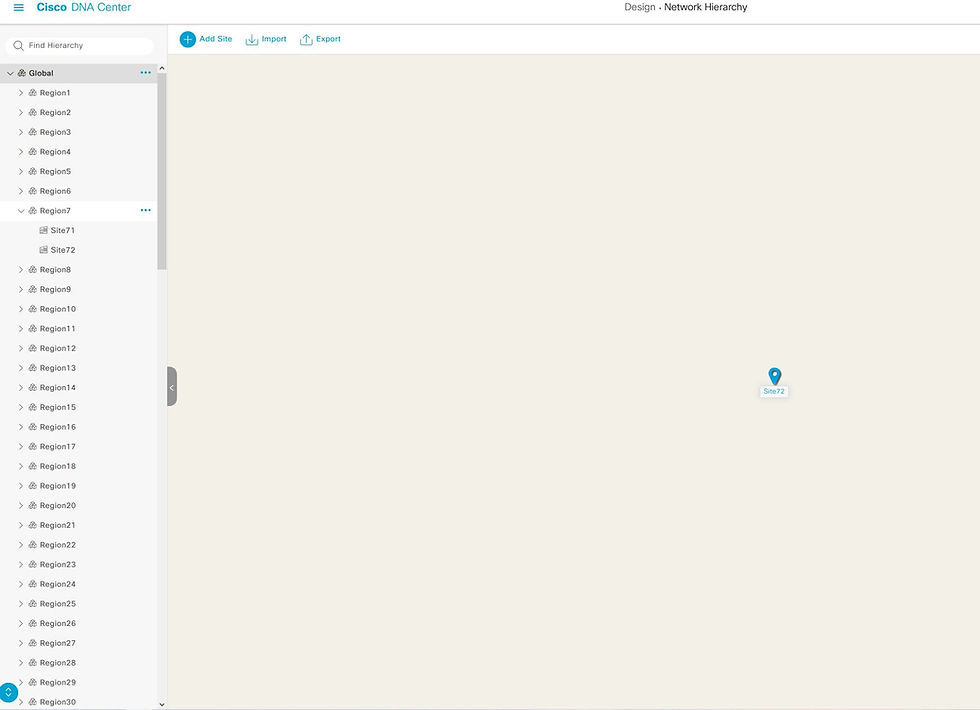
Now, it's time to tackle the IP Pools!
As with previous steps, I followed the same procedure. According to the documentation, I tried reserving an IP Pool and linking it to a building.
Here's how it works in the Catalyst Center:
Create a global pool, sufficiently large to allocate multiple client pools from it.
Reserve portions of this global pool and associate them with a hierarchy element.
Let's start with the global pool. This part is relatively straightforward and doesn't require any complex loops.
ip_pools.tf
resource "dnacenter_global_pool" "default" {
  provider = dnacenter
  parameters {
    settings {
      ippool {

        ip_address_space = "IPv4"
        ip_pool_cidr     = "10.0.0.0/8"
        ip_pool_name     = "global_pool"
        type             = "Generic"
      }
    }
  }
}
After a quick and successful start, I soon realized that managing the pools became more complicated. This complexity arises from the requirement to specify the ID, not the name, of the hierarchy element to which you want to assign the reserved pool.
resource "dnacenter_reserve_ip_subpool" "example" {
  provider = dnacenter

  parameters {

    id = "string"
  }
}
To get this ID, i need to collect this data. Again the docs got my back:
ip_pools.tf
data "dnacenter_site" "specific_site" {
  provider = dnacenter
  count = length(var.ip_pools)
  name     = var.ip_pools[count.index]["parent"]

}
To manage the IP Pools, I needed to go through each one and provide Terraform with the parent's name to obtain its ID. How did I accomplish this? Fortunately, in Netbox, you can specify this within the prefix, making it accessible via the API.
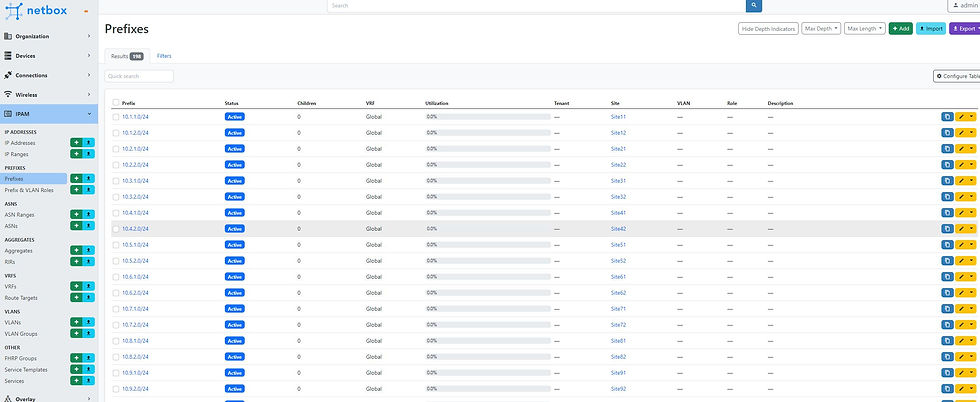
Here's how we extracted the data using Python:
Start by collecting all the prefixes in a list.
Then, iterate through this list of prefixes and extract the name of the parent (the corresponding site).
Since we only need the prefix without the subnet length, I trimmed that off.
create_var_jinja.py
import ipaddress

ip_pools = []
    pools = nb.ipam.prefixes.all()

    for pool in pools:

        tmp_region = ""
        site_object = nb.dcim.sites.filter(name = pool.site)
        for site in site_object:
            tmp_region = site.region

        #get everything together to an dict and append it so the list.
        #netbox is giving back the subnet with prefix, so remove it
        ip_pools.append({
            "name" : f"{pool.site}_{pool.prefix}",
            "gw" : get_gateway(pool.prefix),
            "subnet" : str(pool.prefix).removesuffix('/24'),
            "parent" : f"Global/{tmp_region}/{pool.site}"
        })
I chose to have the first available IP Address in the subnet as my default gateway. I used the library ipaddressess for this:
def get_gateway(ip_pool):
    network = ipaddress.IPv4Network(ip_pool)
    default_gateway = network.network_address + 1

    return str(default_gateway)
After dedicating quite some time, I had my next .tf file ready. For the sake of simplicity, I decided to use some parameters, such as DHCP, DNS, and prefix length, uniformly for all entries. Unlike the parent element, which requires an ID, the global pool can be specified directly as a CIDR in string format.
ip_pools.tf
resource "dnacenter_reserve_ip_subpool" "all_ip_pools" {
  provider = dnacenter
  count = length(var.ip_pools)


  parameters {

    ipv4_dhcp_servers  = ["8.8.8.8"]
    ipv4_dns_servers   = ["8.8.8.8"]
    ipv4_gate_way      = var.ip_pools[count.index]["gw"]
    ipv4_global_pool   = "10.0.0.0/8"
    ipv4_prefix        = "true"
    ipv4_prefix_length = 24
    ipv6_address_space = "false"
    ipv4_subnet        = var.ip_pools[count.index]["subnet"]
    name               = var.ip_pools[count.index]["name"]
    site_id            = data.dnacenter_site.
                         specific_site[count.index].items.0.id
    type               = "Generic"
  }
}
Exept the extra step getting the ID from the Catalyst center, i used a very similar approach, heaving a list with a map. The map containing all the needed parameters for creating a subpool.
Note: that since we need to obtain information from an existing element to create a subpool, it's not possible to run the entire code in one go. To address this, I devised a solution involving two main.tf files in separate folders, executing them sequentially.
Finally, everything got configured on the Catalyst Center just like the CMDB stored it!
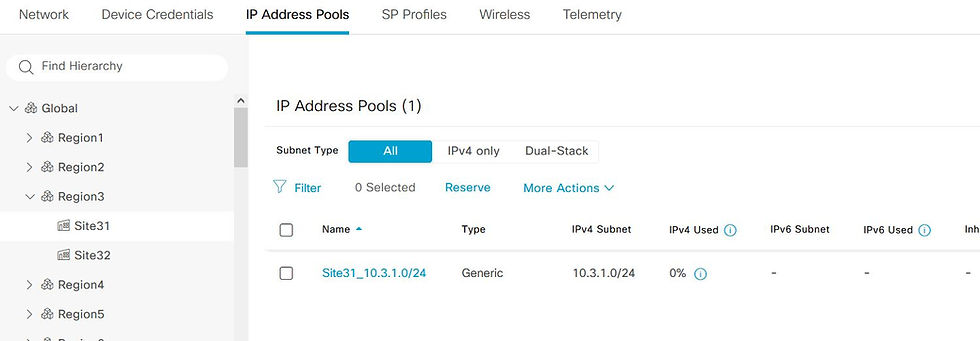
And now, let's talk about the feature I like most about Terraform!
Unlike in Python, there's no need to check if an element already exists on the Catalyst Center or if there's an element on the Catalyst Center that shouldn’t be there. This is a significant advantage.
Looking back at my port-assignment code shared earlier on this blog, you can see that handling these aspects in Python required a lot of time and extensive coding.
Terraform does this for you!
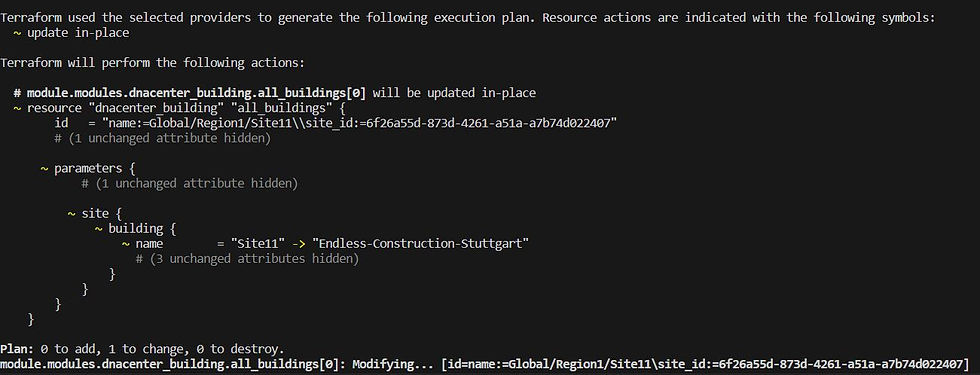
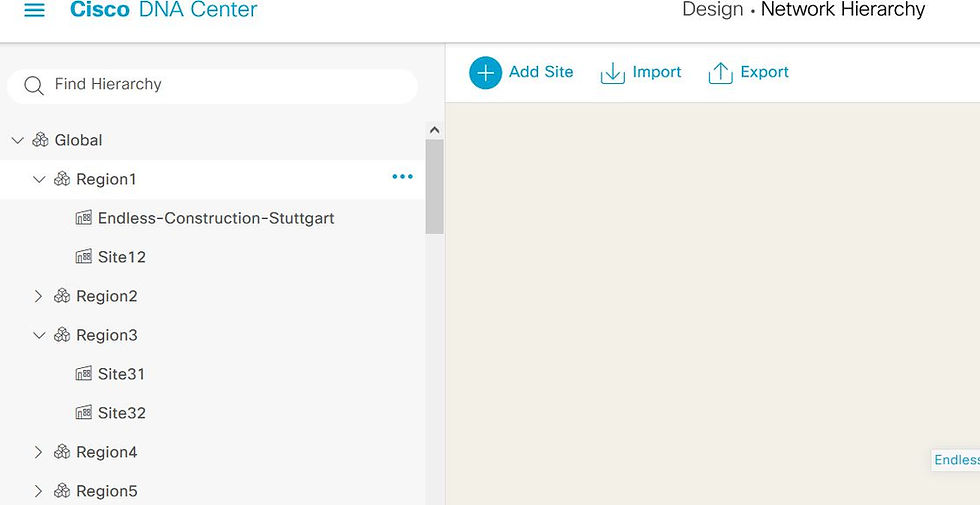
In our case, if we make any changes in Netbox, we simply run the Python code again to rebuild the variables.tf file, and then execute both main.tf files again.
In a real-world scenario, this process would most likely be integrated into a CI/CD pipeline, streamlining the workflow even further.
Lets try to change one Site:

As we wrap up this deep dive into a real world example of deploying and maintaining a Catalyst Center deployment, i hope you learned something useful and see you next time!
whole code:


Comments